Prior to running Batch Scan ensure scanners are powered up and connected to the PC.
- Batch Scan will automatically select the default scanner.
- To select a different scanner:
- Choose Scanner from the menu
- Then choose Select which provides a choice of available scanners.
- Choose the appropriate scanner.
- Subsequently the applications main window will now be accessible.
- If a scanner is not currently available a source troubleshooting window appears.
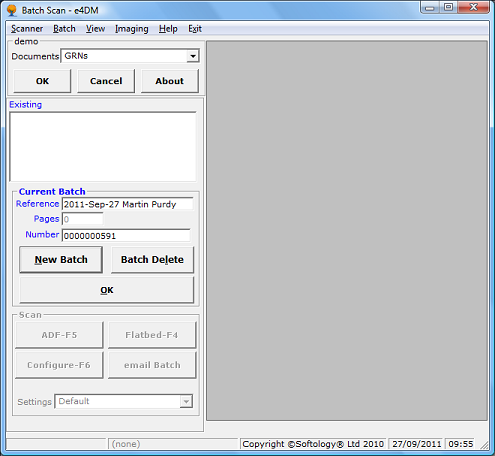
The drop down box contains all currently available Document types.
- Select the appropriate Document Type.
- Select OK to display all current batches for this Document type.
- Cancel to cancel the previous selection.
The scrollable window contains all current batches.
- Select New Batch to create a new batch and proceed to Step 4
- Select an existing batch from the list.
- Select Delete Batch to delete the batch.
- Select OK to add to the currently selected batch.
Information concerning the currently selected batch is displayed
- Batch : represents the system name of the selected batch.
- Pages : represents the number of images within this batch.
- Reference : Indicates any internal reference number entered, by a user, for descriptive
purposes when using the e4DM batch indexing application.
The system default is the user login and current date.
The three buttons are active only if a valid scanner is present.
- ADF Scan - F5 : selection or the F5 key starts the automatic document feed scanning.
- Flatbed Scan F4 - : selection or the F4 button starts flatbed scanning.
- Configure Scanner F6 : selection or the F6 button allows scanner configuration.
- email Batch : selection will allow the emailing of all images in the batch.
